Hiển thị các bài đăng có nhãn UnLock. Hiển thị tất cả bài đăng

Chủ Nhật, 22 tháng 4, 2012

How to Unlock Your iPhone 4S, iPhone 4, iPhone 3GS Using SAM [5.0, 5.0.1, 5.1]


These are instructions on how to unlock your iPhone using SAM. This method will work with the iPhone 4S, iPhone 4, iPhone 3GS, and iPhone 3G on iOS 5.x.

Step One
Jailbreak your iPhone. You can find instructions here

Step Two
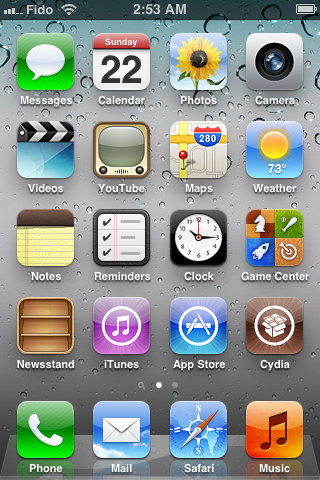
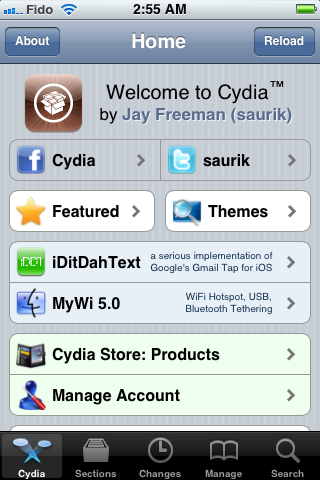
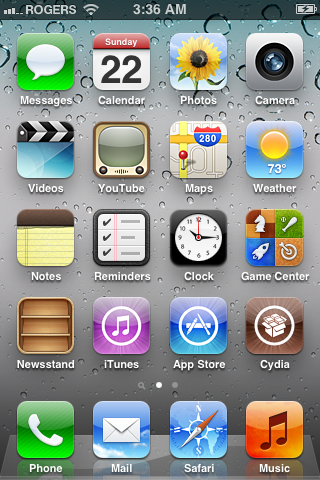
Tap to launch Cydia from your SpringBoard.


Step Three
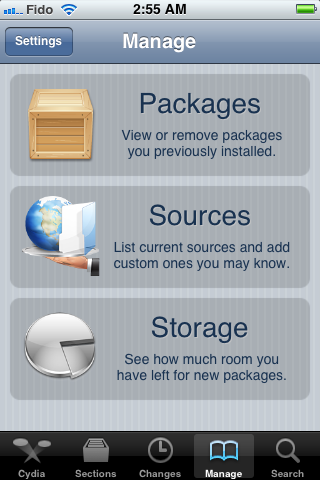
Press to select Manage from the tabs at the bottom of the screen.


Step Four
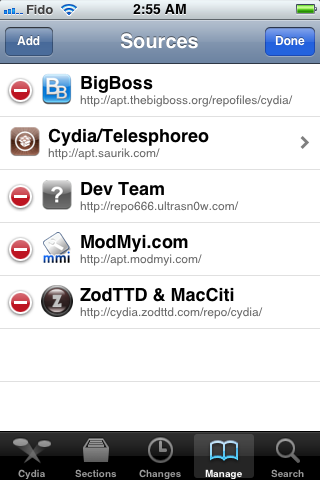
Press the large Sources button.


Step Five
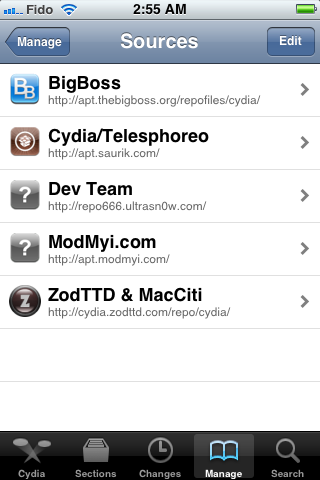
Press the Edit button at the top right of the screen.


Step Six
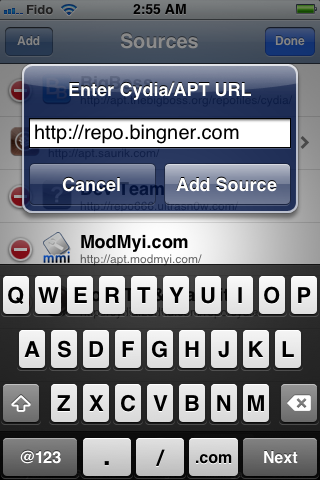
Press the Add button that appears at the top left of the screen.


Step Seven
Enter http://repo.bingner.com and press the Add Source button.


Step Eight
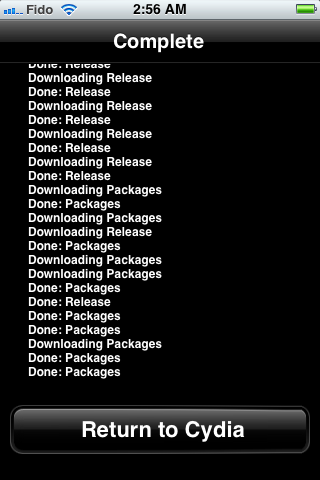
Press the large Return to Cydia button.


Step Nine
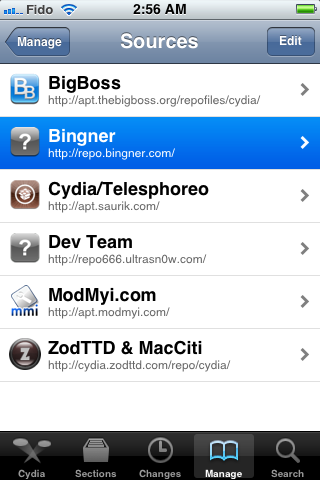
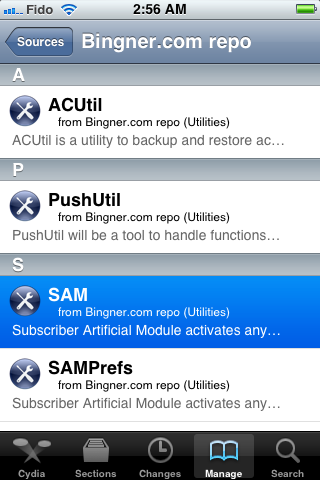
Press to select Bingner from the list of Sources.


Step Ten
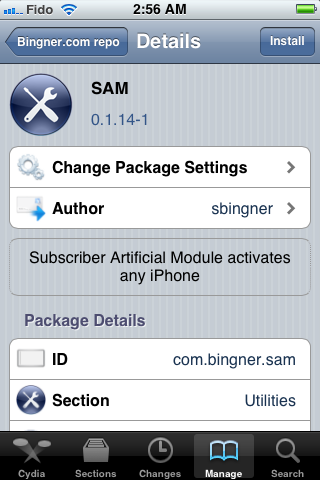
Choose SAM from the list of packages.


Step Eleven
Press the Install button at the top right of the screen.


Step Twelve
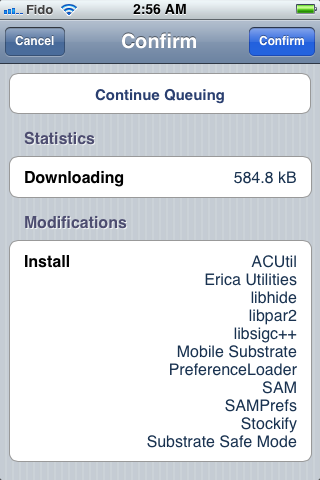
Press the Confirm button to begin installation.


Step Thirteen
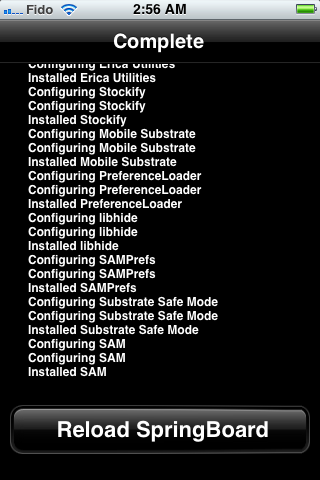
Once installation has completed press the large Restart SpringBoard button.


Step Fourteen
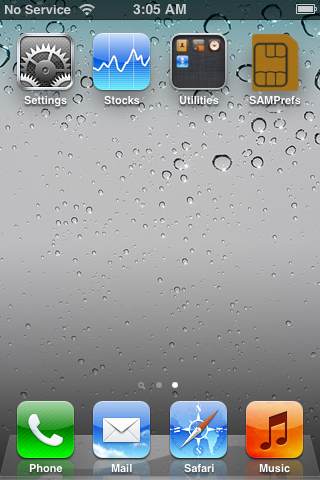
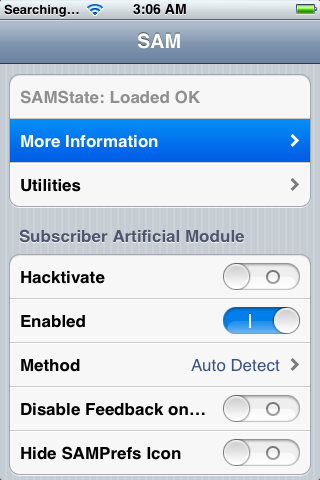
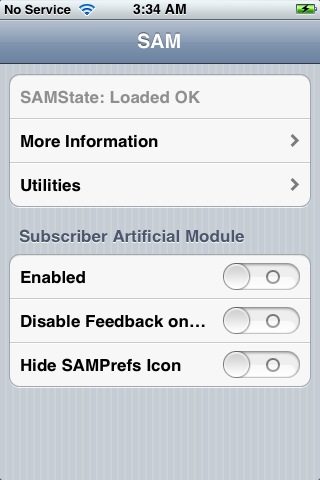
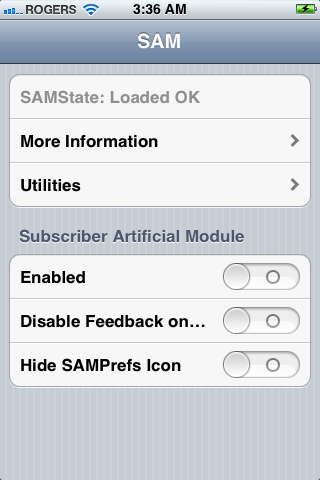
Insert your new SIM card and tap to select SAMPrefs from your SpringBoard.


Step Fifteen
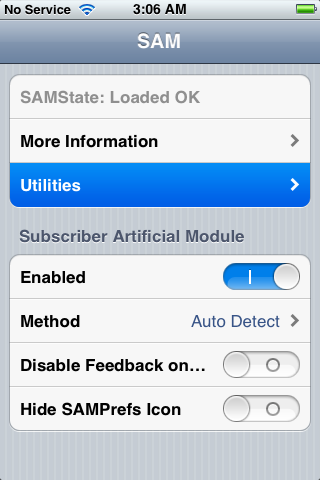
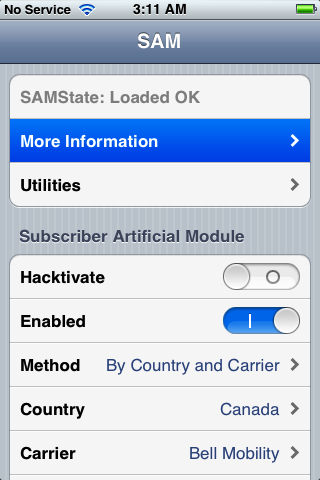
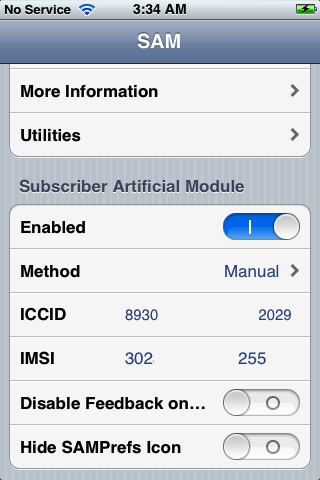
Tap Utilities


Step Sixteen
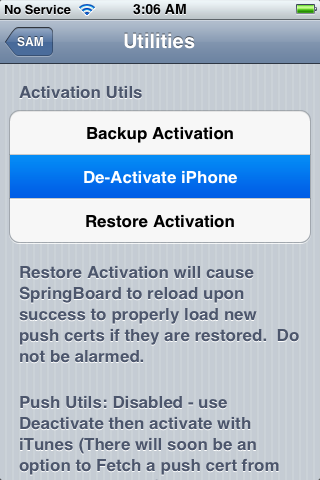
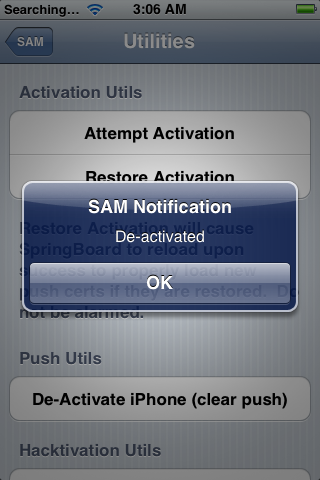
Press to select De-Activate iPhone. Your ActivationState under "More Information" should now be "Unactivated"


Step Seventeen
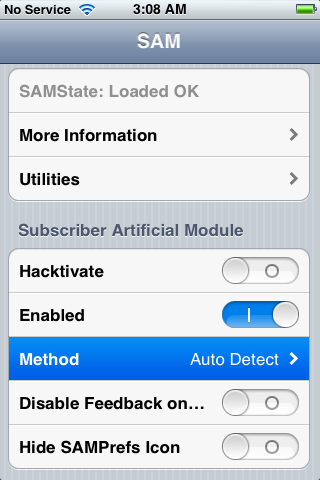
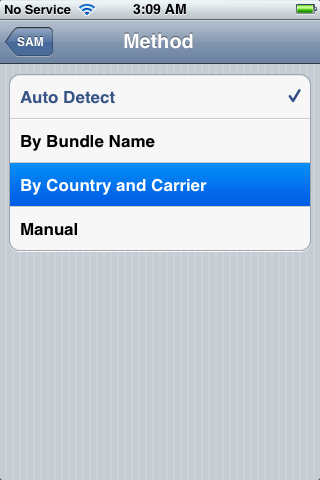
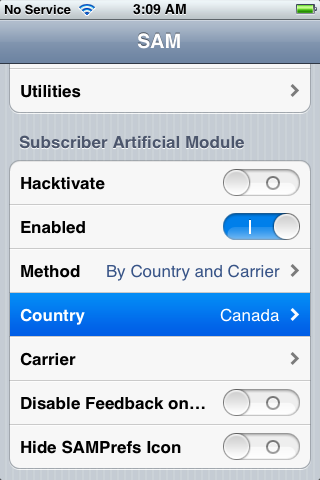
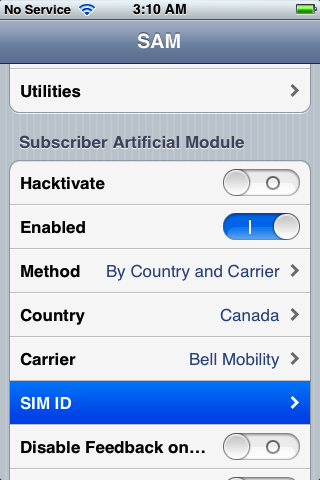
With SAM enabled, tap Method and choose By Country and Carrier.


Step Eighteen
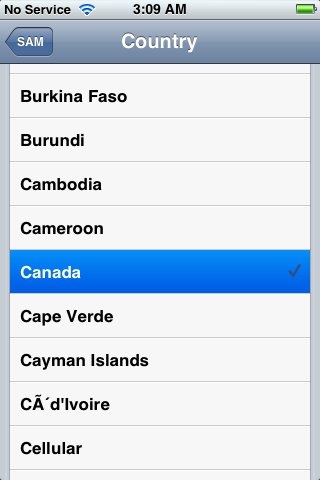
Tap Country and choose the country of your ORIGINAL SIM.


Step Nineteen
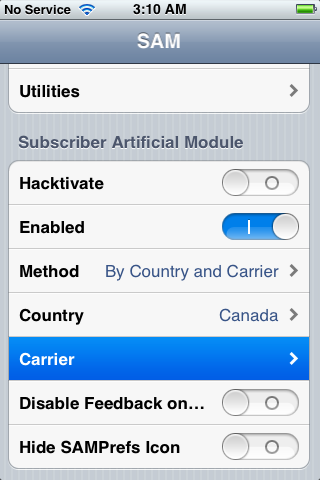
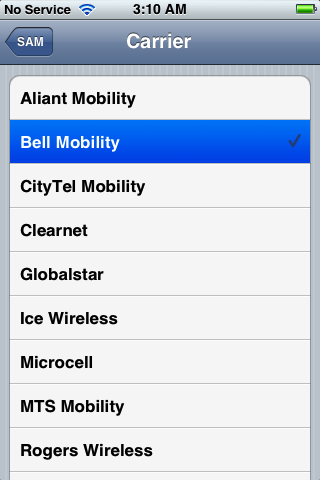
Tap Carrier and choose your ORIGINAL carrier that your iPhone is locked to.


Step Twenty
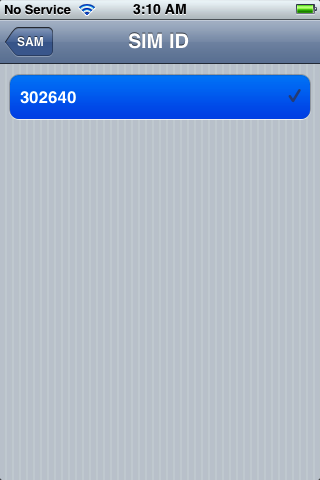
For some carriers operating more than one Carrier ID you may need to select SIM ID. If you are unable to activate in Step Twenty Four then you have selected the wrong one.


Step Twenty One
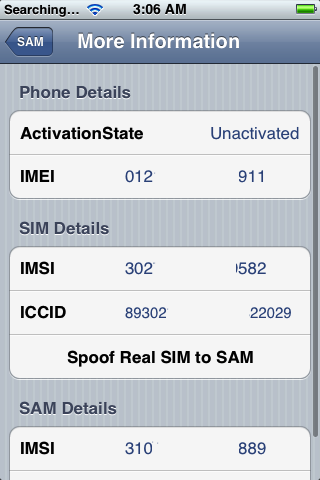
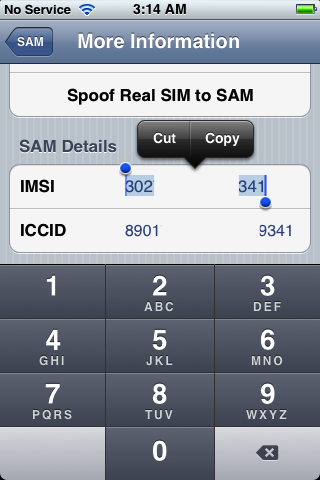
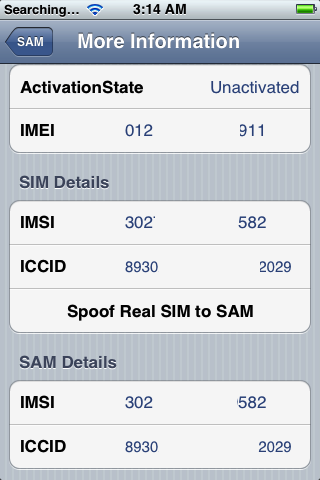
Tap More Information and copy the IMSI under SAM Details to the clipboard.


Step Twenty Two
Tap Spoof Real SIM to SAM


Step Twenty Three
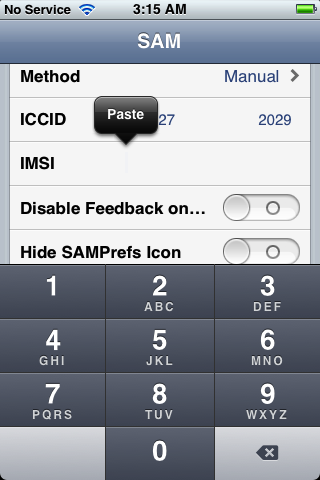
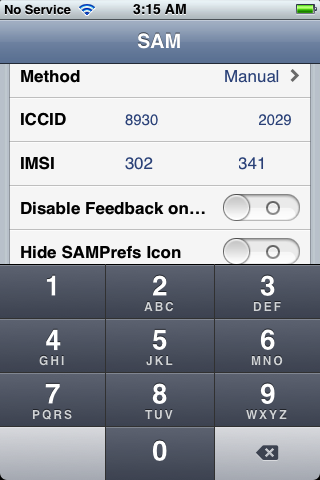
Go back to the main SAM screen and paste the IMSI number in your clipboard.


Step Twenty Four
Connect your iPhone to the computer and let iTunes reactivate your phone.


"Double click "Phone Number" parameter at the main device screen and make sure that the ICCID matches that of your SIM card." If not you need to start over from Step Fourteen."

Step Twenty Five
Unplug your iPhone from the computer and close iTunes.

Step Twenty Six
Reopen SAMPrefs from your SpringBoard and disable it using the Enabled switch.


Step Twenty Seven
Connect your iPhone to the computer and launch iTunes again.


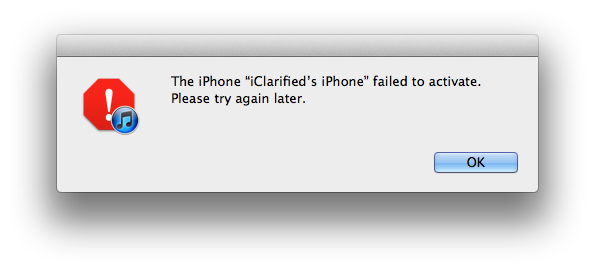
You should get an error saying that your phone cannot be activated. This is normal. Just close iTunes and open it again.


Step Twenty Eight
In a short time you should see signal bars. Congratulations!


IMPORTANT:
If push notifications stop after this process, you can restore then with the Clear Push utility in SAM, followed by connecting to iTunes.

Your phone will work normally with your SIM card and that SIM card ONLY since we have tricked iTunes to think that ICCID is one of the intended carrier's. The phone can be rebooted and connected to iTunes freely without losing the "unlock", at least for now.

A big thanks to Loktar_Sun and Laforet for their contributions!

Thứ Bảy, 17 tháng 3, 2012

Unlock Your iPhone 4S Without Jailbreaking Using the Gevey Ultra S


Gevey recently announced the Gevey Ultra S SIM interposer which unlocks your iPhone 4S without the need for dialing 112 or jailbreaking. The makers claim to be using a new exploit that 'fully unlocks' your device.

We've had to opportunity to test the device and can confirm that it successfully unlocks the iPhone 4S on 5.0 and 5.0.1. The Ultra S does not yet support 5.1 so those who have updated (against all warnings) are out of luck for the time being. However, the team says they are "currently working diligently to unlock 5.1".

Take a look at the video below for instructions on how to use the Ultra S. It can be purchased from the link below for $59.99.


Thứ Hai, 3 tháng 1, 2011

How To Update iPhone 4 to iOS 4.2.1 While Preserving 01.59.00 Baseband[Windows/Mac]

These are the instructions on how to update iPhone 4 to iOS 4.2.1 firmware while preserving the baseband to 01.59.00 so that it could be unlocked. Please keep in mind that jailbreak for 4.2.1 is still tethered. also note that this tutorial is not for you if you have a baseband other than 01.59.00

This method is known to work only with the iPhone 4, hence it may not work on other devices. The procedure seems fairly simple! We highly recommend you to backup everything on your device before following the procedure. Proceed at your own risk only.

Step 1:

Download the original iOS 4.2.1 firmware for iPhone 4 from here.

Step 2:

Now trick iTunes into thinking that it is watching Apple servers, while in real, we are going to change the address to Saurik’s server. To do this:

Navigate to C:\Windows\System32\drivers\etc\ and locate “hosts” file.

Mac OS X users can get to “/etc/” directory by going through “Go –> Go to Folder” from Finder.

Open this “hosts” file in Notepad (for Windows) or TextEdit (for Mac OS X) and add the following line at the end :

74.208.105.171 gs.apple.com

Now simply save this file and you are done.

NOTE for Windows 7 and Vista : Start “Notepad” with Administrator privileges by right clicking on “Notepad” app, and click on “Run as Administrator“ option.

NOTE for Mac OS X: Make sure you have full read and write access on your account when you are saving the host file. If it still throws permission error, simply copy the host file to desktop, make the required changes, and then replace it with the original file in “/etc/” directory.

Step 3:

Start iTunes, click on your iOS device icon from the sidebar in iTunes. Now press and hold left “alt” (option) button on Mac, or Left “Shift” button if you are on Windows on the keyboard and then click on “Restore” (Not “Update” or “Check for Update”) button in the iTunes and then release this button.

This will make iTunes prompt you to select the location for your iOS 4.2.1 firmware file. Select this ipsw file and click on “Open” to restore your iPhone.

Step 4:

Now at some point while restoring to iOS 4.2.1, iTunes will throw 1013 error at you. This is normal, just ignore this error as the firmware has already been successfully installed on the device without the upgraded baseband.

Step 5:

Your iPhone at this point will be stuck in Recovery Mode, showing “Connect to iTunes” screen.

To exit your device from Recovery Mode, download a program called TinyUmbrella. Run it and the click on “Exit Recovery” button. Your device will now restart normally.

Once you have completed this procedure, Go to Settings>General>About on your iPhone, and scroll down to check your Modem Firmware (Baseband), which should now read 01.59.00 (which of course is unlockable using Ultrasn0w).

You should now be able to jailbreak your iPhone 4 on iOS 4.2.1 (tethered) using Redsn0w 0.9.6, or untethered using Redsn0w 0.9.7. Once you have jailbroken your iPhone 4, you can safely unlock it on iOS 4.2.1 (on 01.59.00 baseband) using Ultrasn0w 1.2


How To Update iPhone 4 on 4.2.1 Firmware using Custom Restore with 01.59.00 Baseband

These are the instructions on how to restore or update iPhone 4 on iOS 4.2.1 by preserving the baseband to 01.59.00 using Custom Firmware. Those of you who have already upgraded to 4.1 & 4.2.1 and are on their respective Modem Firmware (02.10.04, 03.10.01) this is strictly NOT for you. wait for the unlock to come.

Step 1:

Download the following files :


Redsn0w 0.9.6b5 OR 0.9.6b6

Mac : Redsn0w 0.9.6b5
Windows : Redsn0w 0.9.6b5
-
Mac : Redsn0w 0.9.6b6
Windows : Redsn0w 0.9.6b6

Stock/Original iOS 4.2.1 Firmware (iPhone 4)

Step 2:
Connect your phone with your computer and switch it off.

Step 3:
Open Redsn0w and browse original 4.2.1 firmware.


Step 4:
if your phone has new bootrom version then select Yes and click on the next button.


Step 5:
Select "Just Enter Pwned DFU Mode Right Now"


Step 6:
click on the next button and follow the on-screen instructions to put your device in DFU mode.


Step 7:
open iTunes. on Summary tab, hold shift key on your keyboard and click on the Restore button. A dialog box will appear , asking you to select .ipsw firmware. select custom 4.2.1 firmware and click Open.


Step 8:
wait for 5-10 minutes for phone to restore.


Step 9:
Disconnect your phone once the restore is complete and connect it again and launch Redsn0w.


Step 10:
Browse original firmware on Redsn0w & select "Yes" if your phone is a new bootrom model and click on next.


Step 11:
Select only "Install Cydia" as option and click on the next button.


Step 12:
follow the instructions and put your iPhone in DFU mode.


Step 13:
if your phone stucks, re-run Redsn0w and select only "just boot tether right now" option and click on next button.


Step 14:
Open Cydia and add repo666.ultrasn0w.com/ to install Ultrasn0w package so that you could unlock your phone.

You now have a fully jailbroken & unlocked iOS 4.2.1 on iPhone 4 with 01.59.00 baseband.
iPhone4.jpg

How To Update Your iPhone 3GS To 4.2.1 While Preserving The Baseband as 05.13.04

These are the instructions on how to jailbreak iPhone 3GS on iOS 4.2.1 by restoring custom firmware with preserved baseband as 05.13.04. those of you who have already upgraded to 4.1/4.2.1 with iPad's 06.15.00 baseband, this is strictly NOT for you. your baseband should be 05.13.04 or below.

Step 1 :

Download the following files :


Redsn0w 0.9.6b5 OR 0.9.6b6

Mac : Redsn0w 0.9.6b5
Windows : Redsn0w 0.9.6b5
-
Mac : Redsn0w 0.9.6b6
Windows : Redsn0w 0.9.6b6

Stock/Original iOS 4.2.1 Firmware (3GS)

Step 2:
Connect your phone with your computer and switch it off.

Step 3:
Open Redsn0w and browse original 4.2.1 firmware.

Step 4:
if your phone has new bootrom version then select Yes and click on the next button.

Step 5:
Select "Just Enter Pwned DFU Mode Right Now"

Step 6:
click on the next button and follow the on-screen instructions to put your device in DFU mode.

Step 7:
open iTunes. on Summary tab, hold shift key on your keyboard and click on the Restore button. A dialog box will appear , asking you to select .ipsw firmware. select custom 4.2.1 firmware and click Open.

Step 8:
wait for 5-10 minutes for phone to restore.

Step 9:
Disconnect your phone once the restore is complete and connect it again and launch Redsn0w.

Step 10:
Browse original firmware on Redsn0w & select "Yes" if your phone is a new bootrom model and click on next.

Step 11:
Select only "Install Cydia" as option and click on the next button.

Step 12:
follow the instructions and put your iPhone in DFU mode.

If you r getting White Cydia Icon just switch of your phone and open redsnow choose Stock firmware 4.2.1 and choose the option "Just boot tethered right now" and click "next" again "next" then follow the screen...then you will see the cydia...

Step 13:
Finally you can see your phone is with old Baseband. now just you can install the ultrasnow 1.2 from Cydia adding repo666.ultrasn0w.com

Posted Image

Chủ Nhật, 5 tháng 12, 2010

How to Jailbreak and Unlock Your iPhone 3G Using RedSn0w (Mac) [4.2.1]


These are instructions on how to jailbreak and unlock your iPhone 3G on the 4.2.1 firmware using RedSn0w for Mac.

If you want to use Redsn0w to jailbreak a lower firmware version you can find the appropriate tutorial here.

IMPORTANT FOR UNLOCKERS
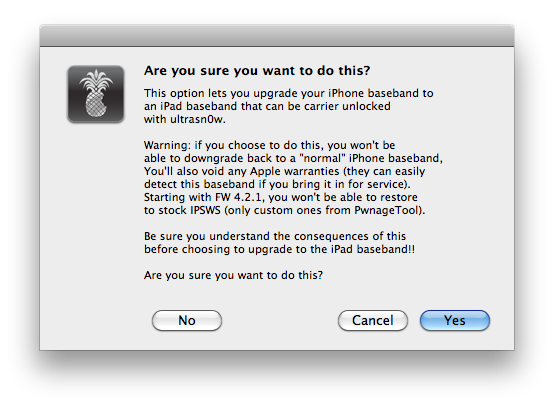
During this process you can update your baseband to the 06.15 version. If you are on 05.14 or 05.15 or higher you will need to do this to unlock. You do not need to do this for jailbreak only. Please read the following very carefully before deciding whether to do this.

1. There is no way to come back down from 06.15, and there’s no hiding the baseband version from Apple. You’ll be voiding your warranty in a very obvious way.
2. If some future baseband comes out with a critical fix, you won’t be able to update to it if it remains down in the 05.xx sequence (then again, you wouldn’t update to it if you wanted to keep your unlock anyway).
3. Starting with FW 4.2.1 if you have 06.15 on your iPhone you won’t ever be able to restore to stock firmware (it will fail). You’ll need to only restore to custom IPSWs (thenagain, if you’re unlocker you should already be doing that).
4. There are reports that 06.15 may disable your GPS. The iPhone Dev-Team is currently working on a fix.

Don’t update to 06.15 if you don’t need to! Only do this if you need the unlock and you’re stuck on 05.14 or 05.15, and you’re willing to assume the above risks. If your baseband is already unlockable and you are on a lower firmware version then use PwnageTool to update to 4.2.1 without upgrading your baseband
.

Step One
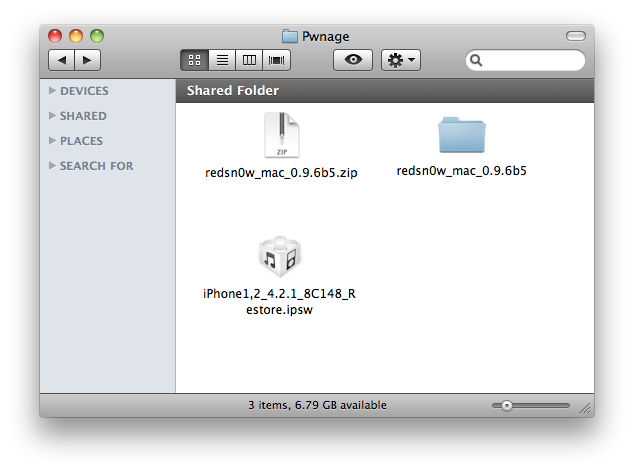
Create a folder on your desktop called Pwnage

Download RedSn0w from here and place it in the Pwnage folder. Likewise, download the latest 4.2.1 firmware from below and place it in the same folder.

4.2.1 (3G): iPhone1,2_4.2.1_8C148_Restore.ipsw

Extract the redsn0w app from the RedSn0w zip file by double clicking it.


Step Two
***If you are already on iOS 4.2.1 you can skip this step. If you are on an unlockable baseband and on a lower firmware you should use PwnageTool instead to update without upgrading your baseband.

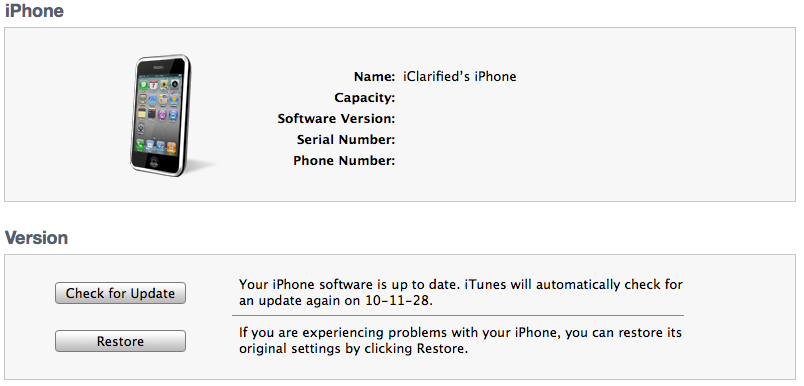
Connect your iPhone to the computer and launch iTunes.


Select your iPhone from the list of devices on the left. Now hold down Option and click the Restore button. Restore is preferred as it won't create any wasted space on your iPhone.


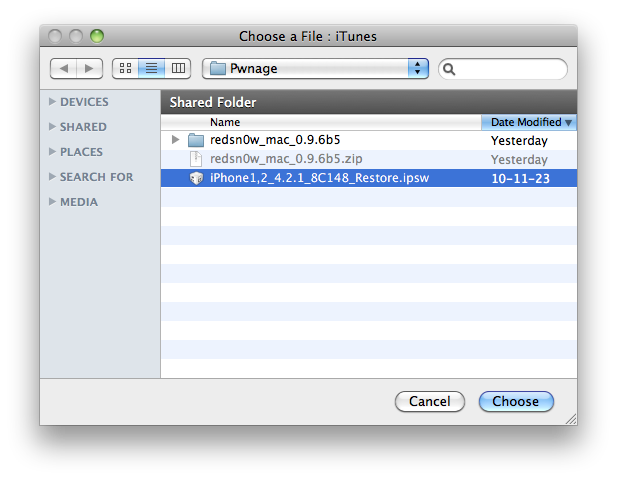
Navigate to the Pwnage folder on your desktop and select the 4.2.1 firmware ipsw. Click the Choose button to continue.


Step Three
Once iTunes has finished updating your iPhone to the desired firmware open the Pwnage folder on your desktop and launch the redsn0w application from the redsn0w folder we extracted earlier.


Step Four
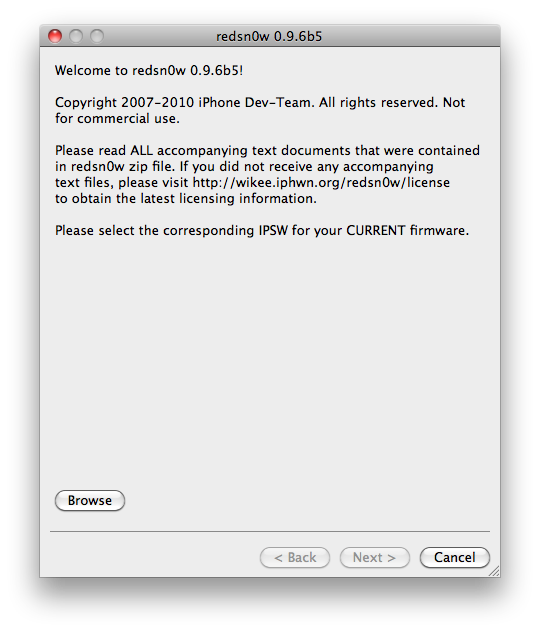
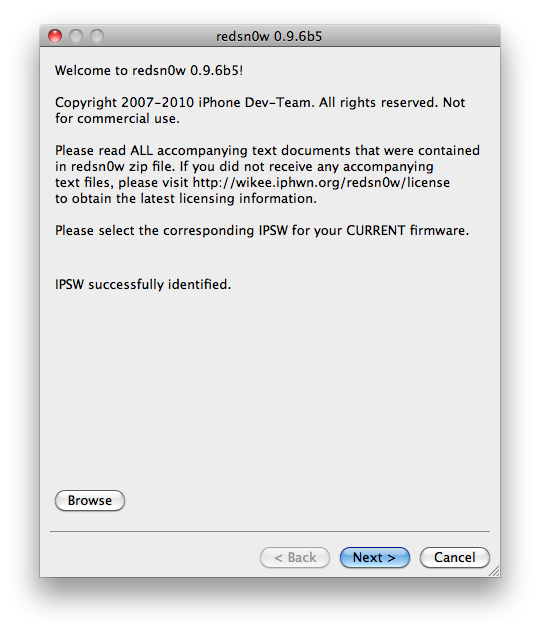
Once RedSn0w opens click the Browse button


Step Five
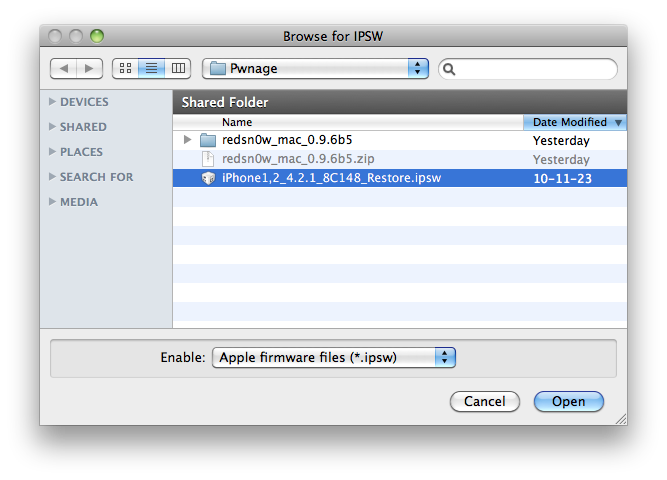
Select the 4.2.1 firmware ipsw we placed in the Pwnage folder on our desktop then click Open.


Step Six
Once the firmware has been verified click the Next button to continue.


Step Seven
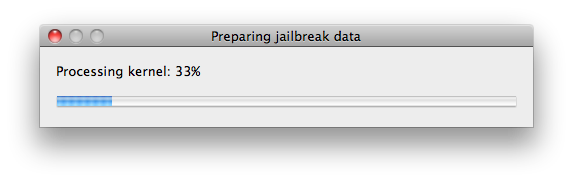
RedSn0w will now prepare the jailbreak data


Step Eight
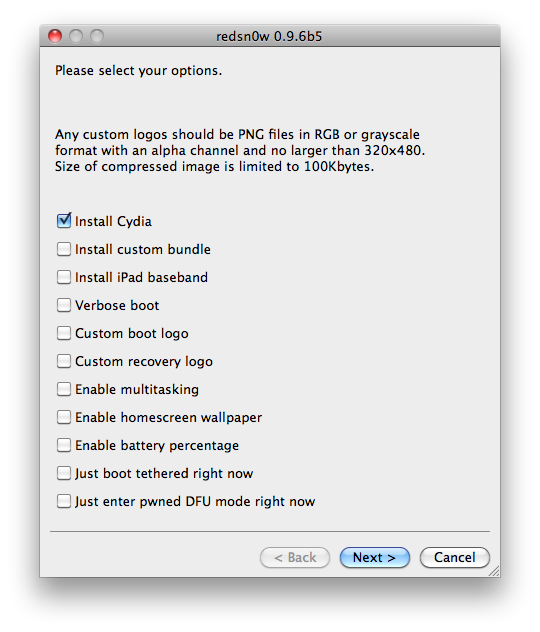
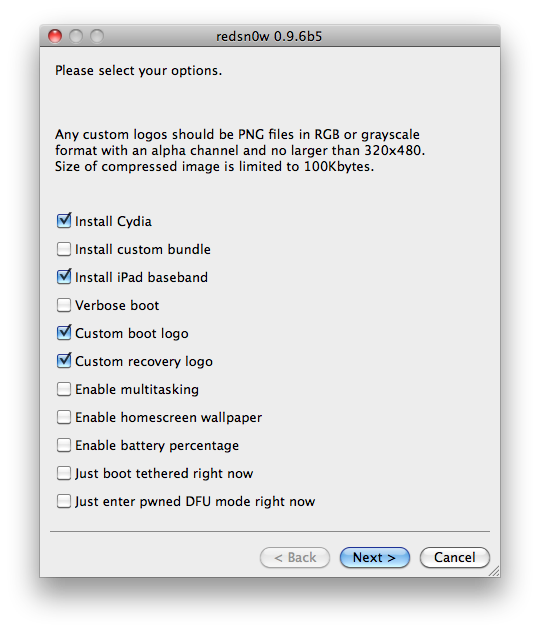
From this window you can select the jailbreak options you would like.


Verbose boot displays detailed information on boot of your device and is generally only needed by developers and advanced users.

Make sure Cydia is selected. For this tutorial we will also select Custom boot logo and Custom recovery logo.

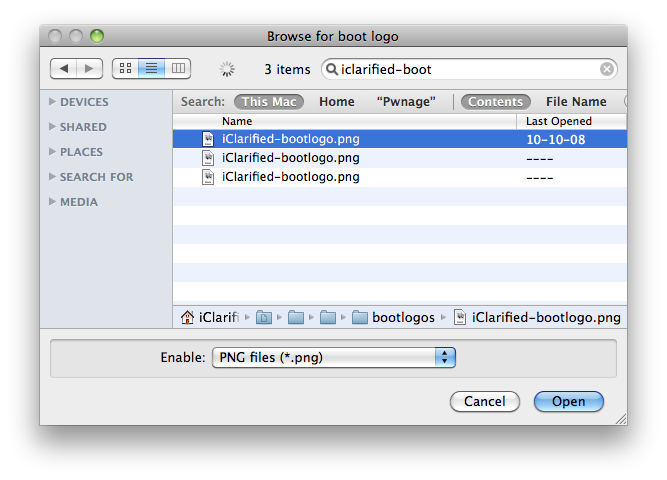
When you click to select each custom logo option a dialog window will appear asking you to select the image. Locate the image you would like to use then press the Open button.


*Remember the rules for boot logos are: RGB or Grayscale format with Alpha channel and dimension below 320x480.

Notice that RedSn0w can Enable multitasking, Enable homescreen wallpaper, and Enable battery percentage. If you do not need multitasking we would recommend deselecting it as it makes your iPhone 3G run very slow.

If you read the warning above and you would like to update your baseband to the 06.15 iPad version for unlock then check Install iPad Baseband. Click Yes when prompted to confirm your decision.


Click the Next button to continue


Step Nine
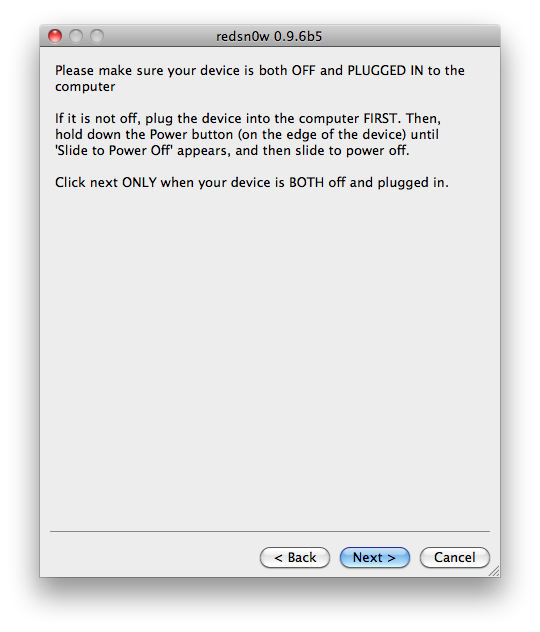
Please plug your iPhone into the computer and make sure its OFF then click the Next button


Step Ten
RedSn0w will now guide you through the steps to get into DFU mode.


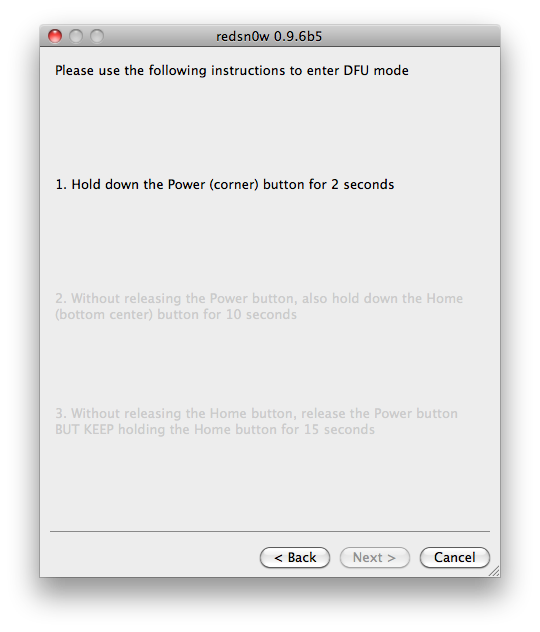
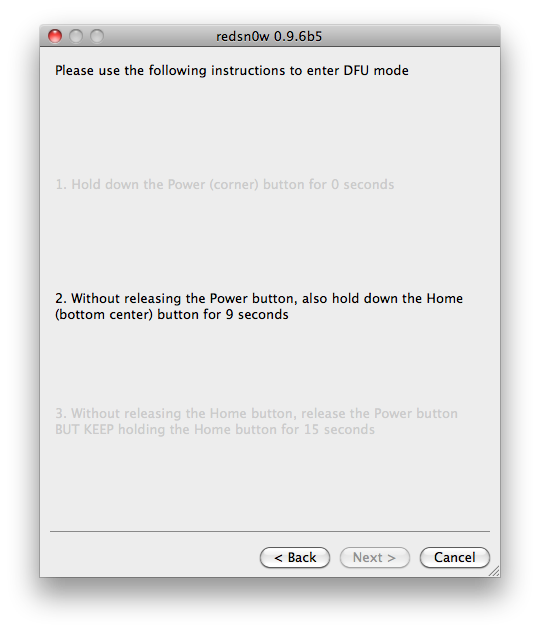
Hold down both the Home button and the Power button for 10 seconds.


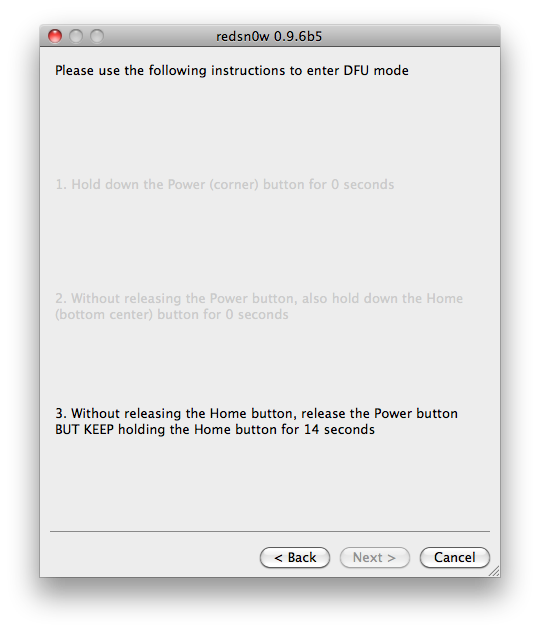
Release the Power button and continue holding the Home button until RedSn0w detects the device.


Step Eleven
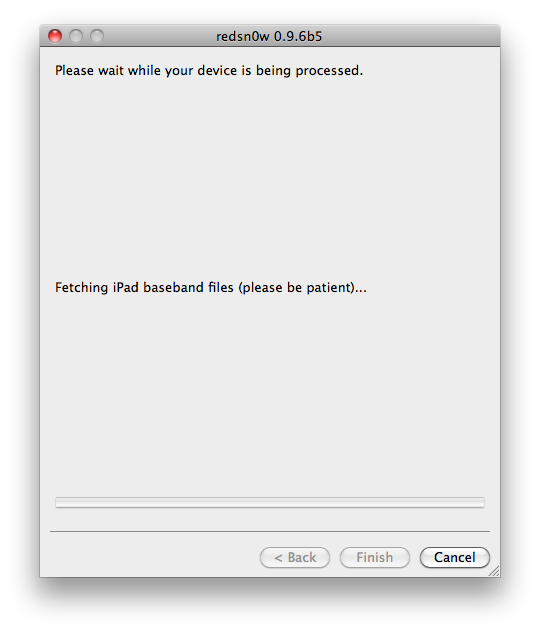
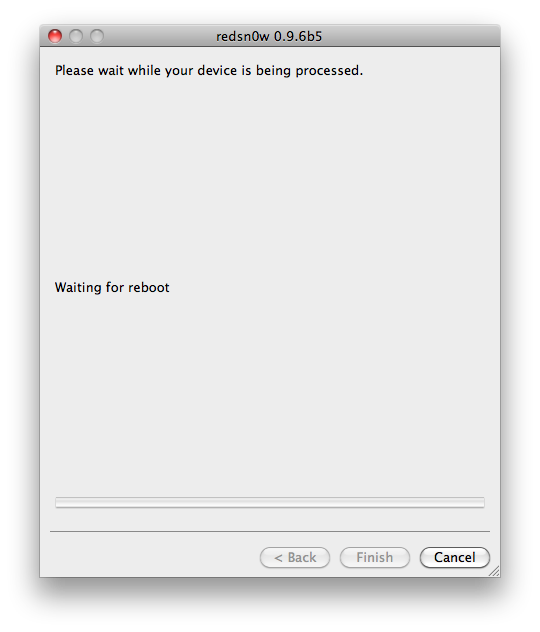
RedSn0w will now download the iPad baseband and your iPhone will now reboot


Step Twelve
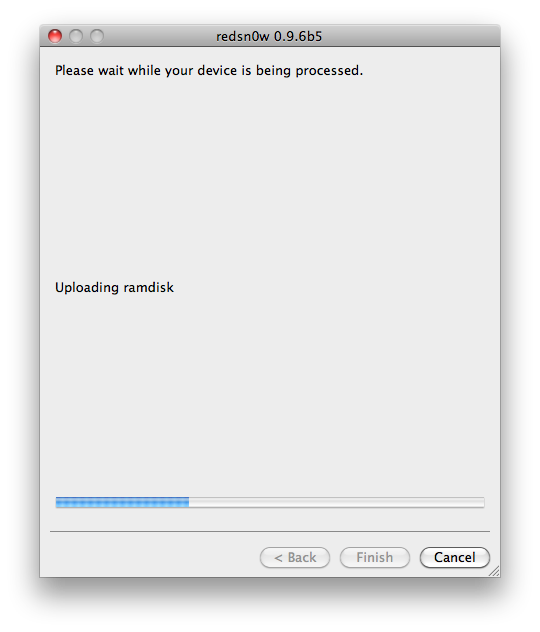
RedSn0w will then begin uploading the new RAM Disk and Kernel.


Step Thirteen
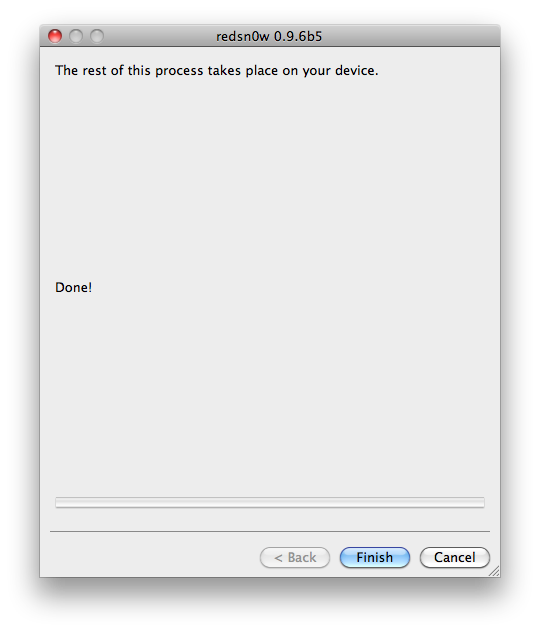
Once this is complete you will be notified that RedSn0w is done. Click the Finish button. When your iPhone finishes rebooting (5 minutes or so) it will be jailbroken with Cydia on the SpringBoard.


Unlock
You can now follow this tutorial to unlock if so desired.

*As usual a big thanks to the iPhone Dev-Team for their hard work and contribution to the iPhone community.

Bài đăng phổ biến